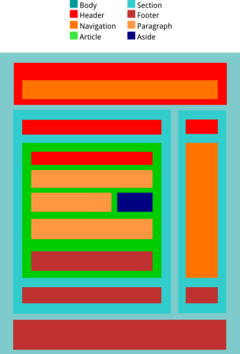
This article is about how to add a a footer section to your blog. It was written in late 2009, before Designer Templates were available. Today, the best approach is to use a Designer template. However this article has been updated for people who are still using Layout templates.
Footer sections and Blogger templates
 Blogger's Designer Templates (ref Template types in Blogger) all let you configure the footer section - you can have a one, two or three column footer, and this together with choosing where to add gadgets gives a lot of flexibility about how the footer looks.
But if you are using an older Layout template that doesn't ave a footer and you want to add one, you can either:
Ading a footer section to a Layout template
Edit your template
Download a full copy of your existing template (in case things go wrong), and put it somewhere safe
Find the part where the code says:
Add the following code immediately before this. (This adds a style for youre new footer to use)
Add this code immediately after that point (this is setting up the footer section in your new template)
maxwidgets='10' showaddelement='yes'>
A similar technique works for adding multiple Footers, if your template already has one - you just have to make sure that the section gets a separate ID (eg id='footer2' in the part in bold-italics).
Related Articles:
Template types in Blogger.
Editing your blog's template: advantanges and disadvantages
Removing the attribution gadget ("Powered by Blogger) from blogs with designer templates
Putting a picture into a blog post
Adding a separator between your posts
Setting up Analytics code on your blog
 Blogger's Designer Templates (ref Template types in Blogger) all let you configure the footer section - you can have a one, two or three column footer, and this together with choosing where to add gadgets gives a lot of flexibility about how the footer looks.
 - Change templates (but this means that any customisations you've made, eg adding Analytics code) will be lost, OR
- Add a footer section to your existing template, by customising the code - provided you are willing to accept the disadvantages of editing your template.
Ading a footer section to a Layout template
Edit your template
- Pre-Sept-11: Design > Edit HTML
- Post-Sept-11: Template > Edit HTML > Proceed
Download a full copy of your existing template (in case things go wrong), and put it somewhere safe
Find the part where the code says:
]]>
Add the following code immediately before this. (This adds a style for youre new footer to use)
#footer {
border-top:1px dotted #999999;
clear:both;
margin:0 auto;
}
Find the part where the code says:
Add this code immediately after that point (this is setting up the footer section in your new template)
A similar technique works for adding multiple Footers, if your template already has one - you just have to make sure that the section gets a separate ID (eg id='footer2' in the part in bold-italics).
Related Articles:
Template types in Blogger.
Editing your blog's template: advantanges and disadvantages
Removing the attribution gadget ("Powered by Blogger) from blogs with designer templates
Putting a picture into a blog post
Adding a separator between your posts
Setting up Analytics code on your blog
Adding a footer section to a Blogger template
![Adding a footer section to a Blogger template]() Reviewed by Unknown
on
مارس 11, 2017
Rating:
Reviewed by Unknown
on
مارس 11, 2017
Rating:


ليست هناك تعليقات: